
Using the Squarespace Promotional Pop-up for your Free Opt-in Gift

The third in a series all about the Free Opt-in Gift, Free download, Freebie, Lead magnet, Lead capture whatever you might want to call it.
This series will include the following different pieces for your reading pleasure.
How do I create a Free Opt-in gift? (specifically with Canva)
This one: How to add your Free Opt-in Gift to the Squarespace Promotional Pop-up?
All the other places to add your Free Download on your website
The real nitty-gritty It’s on my website now what?
Now that you’ve spent a bunch of time creating your Free Opt-In Gift it’s time to get it on your Squarespace website.
There are several different places you should make this available for your potential Ideal Client. Below is a list of places. In today’s post, I’ll walk through how to use the Squarespace built-in Promotional Pop-up. Our next post will walk through all the other options.
Pop up on your site (I know some people don’t like these but they really really work)
Footer
Landing page
Home page
Blog posts
For today’s example, we are going to assume your Free Download is a pdf file that you’ve already created and reduced the size of. To learn how to resize a pdf file see this post and watch the video at the end
First: Decide do you want an instant download or would you like an email sent out with your amazing opt-in gift?
I personally like to do both, more on this in a future post. For today’s example, we are going to assume you want to do both of these.
Uploading a pdf file to your Squarespace site.
Once you upload a file to your site it stays there so we’re going to start with uploading it in a hidden page.
Step 1 uploading a file to your Squarespace site:
Navigate to a hidden page on your site (that is a page that is not enabled). I have a design page on my site that I look to for fonts, colors, formatting and that kind of stuff.
Step 2 uploading a file to your Squarespace site:
Add an image block of any kind.
Step 3 uploading a file to your Squarespace site:
Select the gear icon under the link and click on file.
Step 4 uploading a file to your Squarespace site:
Hit upload file, a window will open and you can select the file you saved for your free download. Make sure this file is named properly since it will show up in other locations see this post for details on how to save and name your file
Step 5 uploading a file to your Squarespace site:
Hit save, you can then delete that image or leave it since this is on a disabled page within your site.


That was the easy part! We have your free Opt-in gift on your site.
Now it’s time to start making it visible for the world to see! We’ll start with creating a pop-up within Squarespace.
For today’s example we are going to use the pop up that is available within Squarespace and not another product like Convert Kit, Mail Chimp, etc. These options are all available but we’ll detail that in a different post.
We’ll be using an example 7.0 site for this.
Step 1 of Creating a pop-up in Squarespace
Navigate to your main menu and select marketing
Step 2 of Creating a pop-up in Squarespace
Scroll down to engagement and select promotional Pop-up. Keep in mind this feature is only available on business and commerce plans.

Step 3 Select your Pop-up in Squarespace.
This one can get overwhelming and there are lots and lots of options. If this is your first time pick one that is simple and go with that.
Select Change layout you’ll notice that there are 9 different options. I’m going to select the second option this has a picture on the left and the details on the right. Switching to mobile view you’ll notice the picture has changed.
Select Save and hit the back arrow!

Step 4 Designing your Pop-up in Squarespace
Now we have several steps to go through in the Pop-up
Action, Content, Display & Timing, Image, and Style. We’ll go through each of these in order.
Action:
You’ll select Sign up for a Newsletter or click a button. If you already have a great landing page created select this option if not and you are just getting started you will select Sign up for a Newsletter. This will allow you to capture your potential customer’s email address.
We’re going to change the button Submit label by typing in whatever you would like. Today I’m going to use Download Now! This will default to Subscribe.
Select Storage next. You have three options here Connect to Squarespace email campaigns, Connect to Mailchimp, or connect to google drive. If you are using Squarespace email or Mailchimp select one of those and follow the steps to connect to your account. If you use a different email service select Google Drive, follow the steps to connect to your google drive of choice, and type in a spreadsheet name. (we’ll go over how to connect to your email list down below using Zapier
Next, you will select Post-Submit. With this option of a newsletter, it does not allow you to automatically redirect to another page, but that’s okay we have a few options here. The default Post-Submit message is Thank you! Let’s change that to:
Thank you for Downloading my Free Guide. Please check your email for your download or you can download it HERE
We are going to highlight the HERE word and link it to the file that you’ve already uploaded to your site. Highlight the word HERE, select the link icon. Navigate to File, then select the file you’ve already uploaded, select open in new window if you would like to keep them on your site. Then hit close and make sure you also hit apply in the text section. The next step is to hit save, we’re not ready to move onto Content!
Disclaimer. There is a default disclaimer listed below the submit button. You can change the wording in here to whatever you like, but if you are collecting email, phone, name you will need to link to your privacy policy. This post has important details on why you need a privacy policy page

Content
This is where we will add in the details of what we want them to Download. It should be short sweet, and important to them. Remember our example from the last post, it was 5 Abdominal Exercises you can perform anywhere. We are going to add in some details of that here. Now select save and then the back arrow.
Display & Timing
There are a lot of options here and we can get really fancy, but now I like to stick with the defaults except for the Frequency option. The default is 30 days for this example let’s change this to the Next Day.

Image
For the Pop-up design, we selected there is a picture and now it’s time to add that. A really great best practice is to add an image of the actual download. You can create this in Canva using a mock-up or you can save the first page of your Free download as an image. Another option is to use a stock or professional that is relevant to what your download is.
Select Image, then select upload image.
You can see in the photo I show an image of my free download on an iPhone. You can easily create that in Canva with your very own opt-in gift that you created.
Select the back button and we’ve added your photo.
* Make sure your photo size is 500kb or less
* Make sure you have named your photo to something relevant to what it is. (this is for SEO purposes)

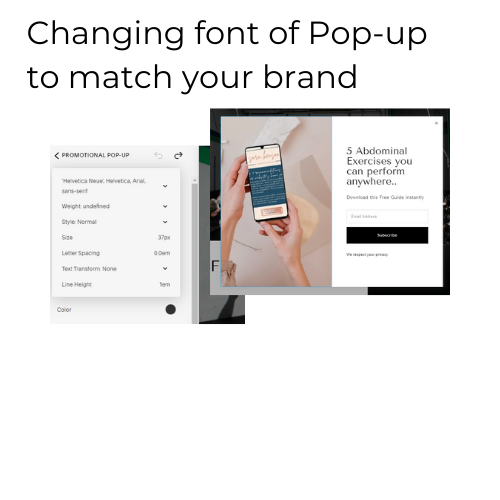
Now it’s time to Style your Pop-up
Ideally, we want your pop-up fonts and colors to match the rest of your site. A quick tip here is to keep a file on your computer or in Canva if you use it with a list of your Heading and body fonts, as well as all of your colors so you have easy access. Follow the steps below to style your pop-up for desktop and mobile
Select style and start with Desktop. You’ll go through your Headline, Body, and Button Fonts and colors and have them match your brand. For this example we’ll use Tenor Sans as the fonts.
Now to style this in mobile. I like to switch my view in the Squarespace editor to Mobile so I can see what it looks like first. That is going to be the little line on top and you can select the Icon that looks like a mobile phone.
The default style might be just fine, or you might need to tweak a few things to make it look better. The thing I usually add when using the Squarespace default Pop-up is a border on Mobile. It draws a bit more attention to the pop-up.
First select Border
Then you will adjust the color and border width to match your design. In this example, I’ve changed the width to 5px and left the color at the standard.
Select Save then the back button!


The almost final step in using your Squarespace Promotional Pop-up for your Free Opt-in Gift!
You’re almost there. It’s time to go live with your pop-up! The reason I say the almost final step is we need to make sure you have an email set up to automatically send to your new subscriber. For today let’s assume you’ve done this already. If you haven’t don’t worry coming soon will be details on how to get that set up.
In the top left corner of promotional pop-up, you’ll see a toggle button that says display Pop-up. After your emails are all set up toggle that to Display Pop-up then hit save!

What’s next in the series of Creating a Free Opt-in Gift
Next time we’ll cover the following:
How to add a block in your footer to capture emails and provide the free download
How to add this to your blog posts
How to integrate to other software not Squarespace email or mail chimp
How to add in non-Squarespace pop-ups and forms
Then the final post in this series is going to be all about what do you do with the contacts once you have them.
Ready to check out my Free Download?
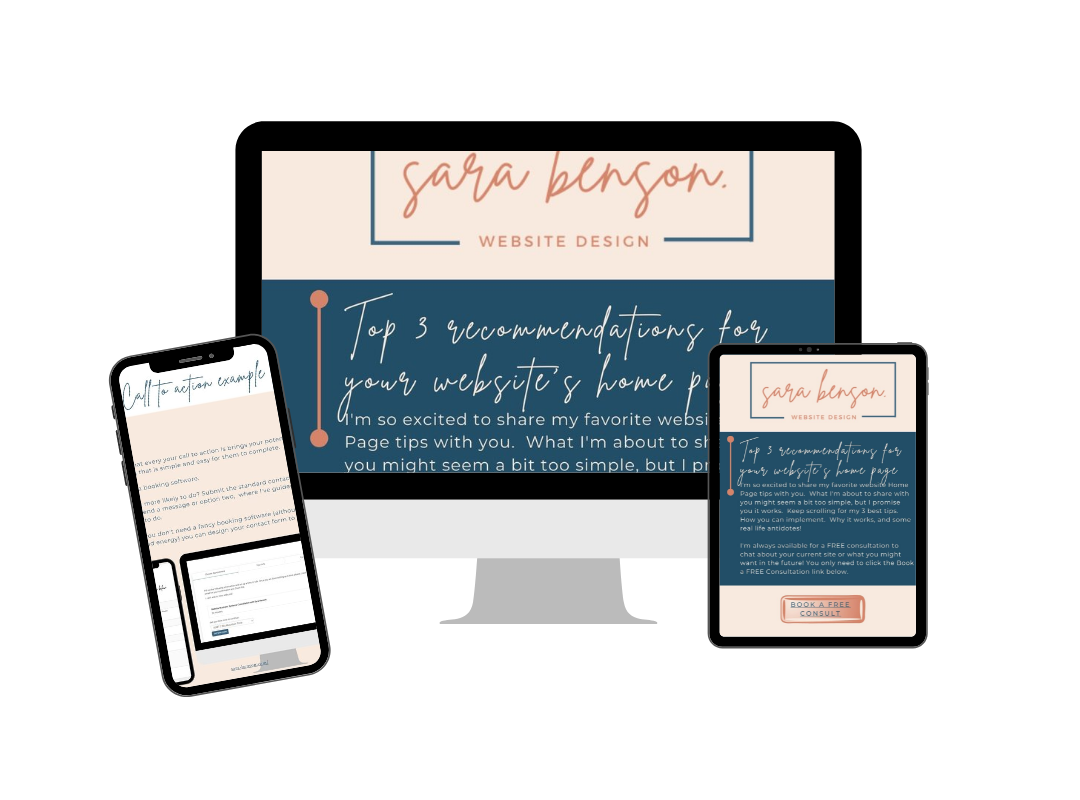
Seriously I can’t tell you that you need to have one without having one of my own. Mine is a workbook on figuring out exactly what should be on your home page. This will provide a little bit of help to figure out what your website’s primary goal is.
If you’ve landed on my site my primary goal is for someone in need of a new website or website redesign to book a free consultation so we can discuss if we are a good fit for each other.
My secondary goal is to provide help to those that are managing their own site or want to create a DIY site. This help can be anything from working on your Squarespace site to set up all those fun systems and processes.
Happy Designing!
Sara
PSST!
Want to crush your homepage design?
Learn about my TOP 3 Home Page Recommendations and Download my FREE workbook!
Other Squarespace and Business tips you might find useful as a studio owner
Why do I need a Free Download?
Using Canva to create a Free Opt-in gift
How to remove the Header and Footer on Squarespace and Why
My top must-have software for your fitness studio on a budget

Hi I’m Sara
While I’m not working on helping awesome people with their website and automation you can find me outdoors in Utah or teaching Pilates and Fitness classes. Prior to designing website for health and wellness businesses I owned and operated a CrossFit Gym and Pialtes studio in Virgina.